PostgreSQL
Last updated
Last updated
1. Access Connectors Page
- Go to the application menu and navigate to the Connectors section.
2. Configure Connection
- Click the button to add a new connection.
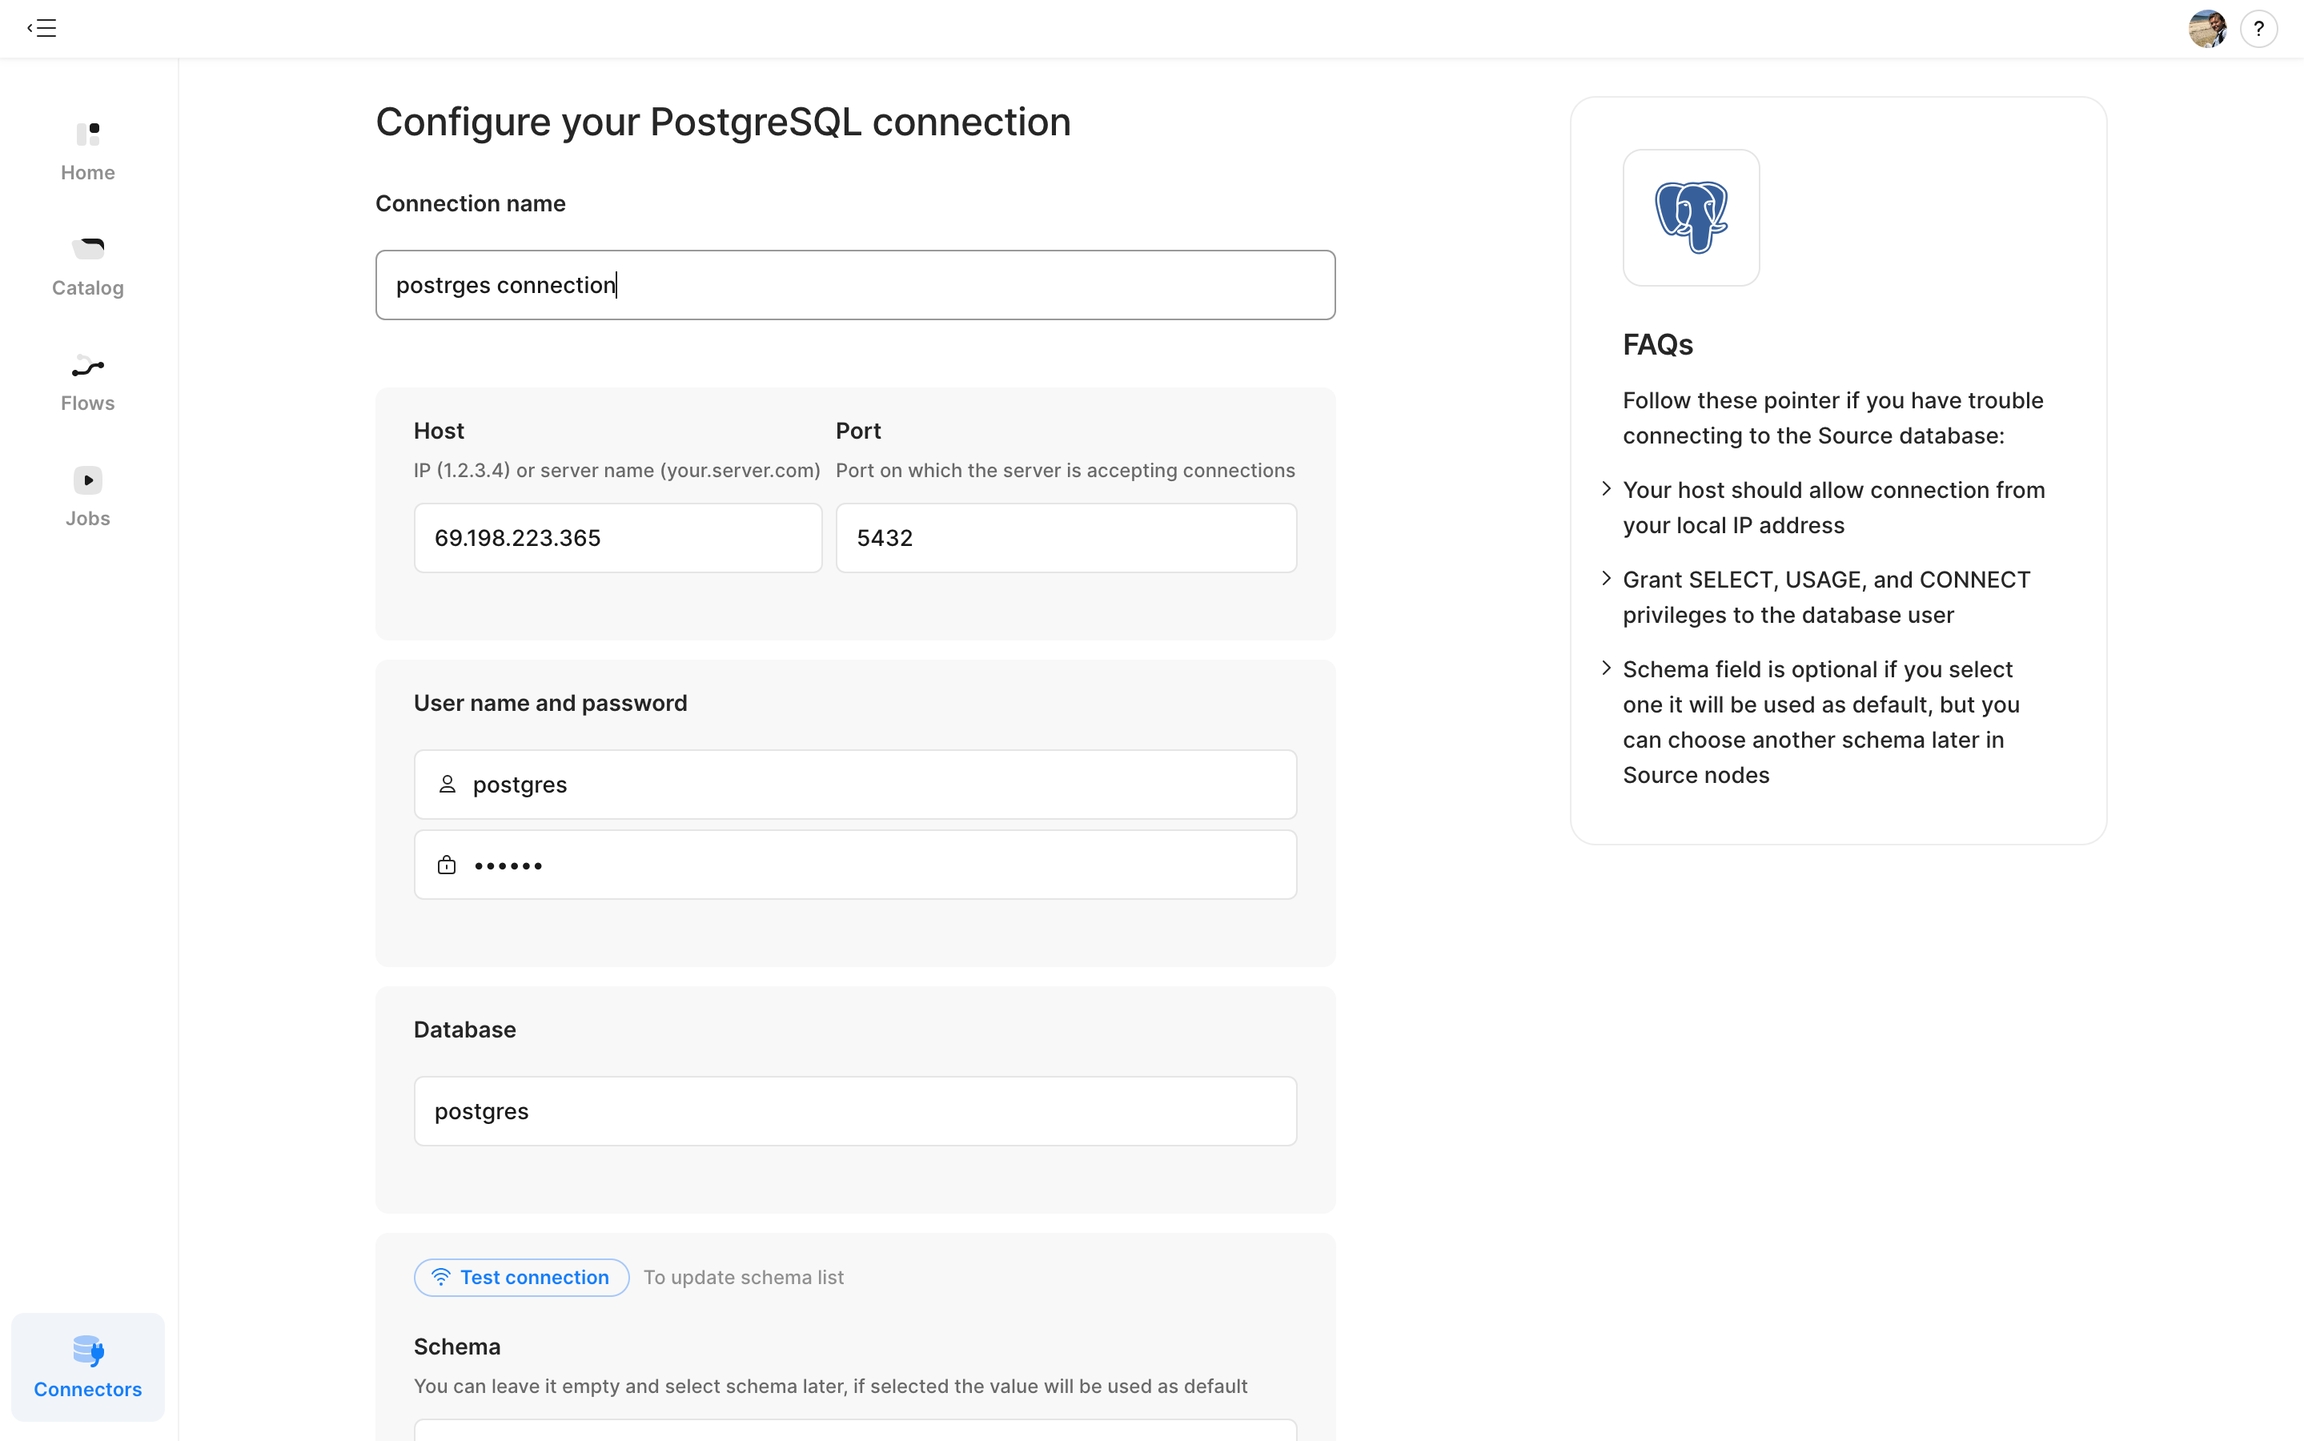
3. Enter Connection Details
- Connection Name: Provide a name for the connection, e.g., PostgreSQL.
- Host: Enter the host IP or server name. Example: tabula-stage.cluster-cxgn5xpb8h.
- Port: Specify the port, usually 5432.
4. Authentication
- User Name: Enter your PostgreSQL user name.
- Password: Enter the corresponding password.
5. Database Information
- Database: Enter the database name you wish to use. Example: dev_env.
- Schema (Optional): Provide a schema if needed. You can leave it empty and select a schema later.
6. Test Connection
- Click the Test connection button to ensure all details are correct and the connection can be established.
7. Save Configuration
- Once the test is successful, click the Save and test button to save your connector settings.
8. FAQs and Troubleshooting
- Make sure your host allows connections from your local IP.
- Verify that the database user has the necessary privileges: SELECT, USAGE, CONNECT.
- If the schema field is left empty, a default will be used but can be changed later.
By following these steps, you will successfully add and configure a PostgreSQL connector within your application.